Nodejs - Getting started
Introduction about NodeJS
So, you want to run JavaScript on the server? You’ve come to the right place. Node.js is an open source, cross-platform JavaScript runtime environment for developing server-side and networking applications. This popular server platform is built on Chrome's V8 JavaScript engine and enables you to use JavaScript code outside of a browser.
A Node.js app runs in a single process, without creating a new thread for every request. Node.js provides a set of asynchronous I/O primitives in its standard library that prevent JavaScript code from blocking and generally, libraries in Node.js are written using non-blocking paradigms, making blocking behavior the exception rather than the norm.
When Node.js performs an I/O operation, like reading from the network, accessing a database or the filesystem, instead of blocking the thread and wasting CPU cycles waiting, Node.js will resume the operations when the response comes back.
This allows Node.js to handle thousands of concurrent connections with a single server without introducing the burden of managing thread concurrency, which could be a significant source of bugs.
Node.js has a unique advantage because millions of frontend developers that write JavaScript for the browser are now able to write the server-side code in addition to the client-side code without the need to learn a completely different language.
In Node.js the new ECMAScript standards can be used without problems, as you don't have to wait for all your users to update their browsers - you are in charge of deciding which ECMAScript version to use by changing the Node.js version, and you can also enable specific experimental features by running Node.js with flags.
Learning path :
- Install the node program itself, along with npm for managing Node projects
- Take a tour of Node.js, including the Node runtime, the Read-Eval-Print Loop, the non-blocking I/O model, and the npm ecosystem
- Examine Node's module system
- Learn how to use the Chrome V8 profiler
- Get an overview of promises
- Explore event loops, including creating custom events, using streams, and passing arguments to timer callbacks
- Join a mock Node project team, where you write your first Node.js application
- Understand the Node package manager and Node dependency management
- Learn about several tools that can help you test your Node applications to catch any bugs
Installation
Node.js can be installed in different ways. This post highlights the most common and convenient ones. Official packages for all the major platforms are available at https://nodejs.dev/download/.
One very convenient way to install Node.js is through a package manager. In this case, every operating system has its own. Other package managers for MacOS, Linux, and Windows are listed in https://nodejs.dev/download/package-manager/
nvm is a popular way to run Node.js. It allows you to easily switch the Node.js version, and install new versions to try and easily rollback if something breaks. It is also very useful to test your code with old Node.js versions.
See https://github.com/nvm-sh/nvm for more information about this option.
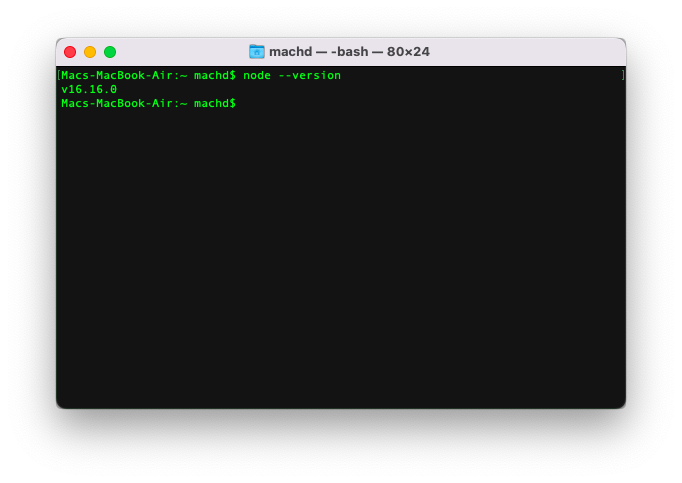
In any case, when Node.js is installed you'll have access to the node executable program in the command line. Check the nodejs installation using command line.

The above images shows the nodejs version v16.16.0 installed on the system.
Nodejs event loop
The event loop is a set of six operations or phases that perform some very specific tasks.
It's implemented by this C library called libuv. it's a quite extensive library. But this library is also responsible for keeping Node.js running with its non-blocking or asynchronous operations.
What happens is when it receives a request, this request if it contains any long operations, things like I/O operations, for example, reading and writing files, or DB connections, or DB queries, and things like that, they will offload these operations to the system kernel. While it's doing that at the background, the event loop keeps processing on this request and so forth. To understand or see this little bit better, let's go back and look at the processing model.
Here is the Node.js processing model we've seen earlier. A request comes in, the event loop process that request, if there's any running operations it send that off to the back for a tripple to processes those information, when they're done, they send back to the event loop and then it will send that up to the user. Let's take a look inside this red arrow area where all those phases occur. Here is the event loop cycle. We have the Node.js, single thread, a non-block, and event loop here.
The first phase is the timer. This phase is responsible for executing any callbacks that are scheduled by two very important functions, the set timeout and set interval.
The second phase is depending callbacks. This one here executes any I/O callbacks and defer it to the next loop iteration.
Phase 3, the idle and prepare, it's an internal use only phase. It's responsible for executing any callbacks for some system operations like TCP errors and so forth.
The fourth phase is a really important one. This phase is responsible for two main functions. One, is it calculates how long it should block or poll for any I/O events or operations. Then two, it'll process events in the poll queue, and only that is also responsible for controlling when timers should execute.
The next phase, phase 5, is where it allows you, the developer, to execute any callbacks immediately after the polled phase 4. Mostly here, the most important function here is the set immediate function, and the callbacks in that function are invoked immediately and let them right in this phase.
The last phase, phase 6, is the close callback. This is more of a cleanup phase where it will close some callbacks, especially we do a socket I/O or connection, then when you close a connection and then it'll handle all these events, the close events rather at the particular phase.